

Curved text is an exceptional feature that offers your video a uniqueness that regular text layouts simply can’t achieve. Depending on your video’s topic and the goals you want to achieve, whether it is content for social media, marketing, or personal purposes, Curved Text will add value and professionalism to your videos. This article shows the importance of Curved Text on videos and how you can achieve that quickly using Filmora.
Why Use Curved Text in Videos?
The curved text offers several advantages in video design:
● Visual Appeal: Curved Text in the videos guides the viewers’ attention and creates a feeling of dynamism and motion.
● Creativity: It offers greater freedom to apply styles, meaning your text will conform to the shape of the other objects in your video.
● Space Utilization: Curved text can easily assume the shape of an object, a curve, or any other form, and it can be placed in tighter areas of the video frame compared to straight text.
Getting Started with Filmora
Step-by-Step Guide to Adding Curved Text in Filmora
Here’s how you can add curved text to your videos using Filmora:
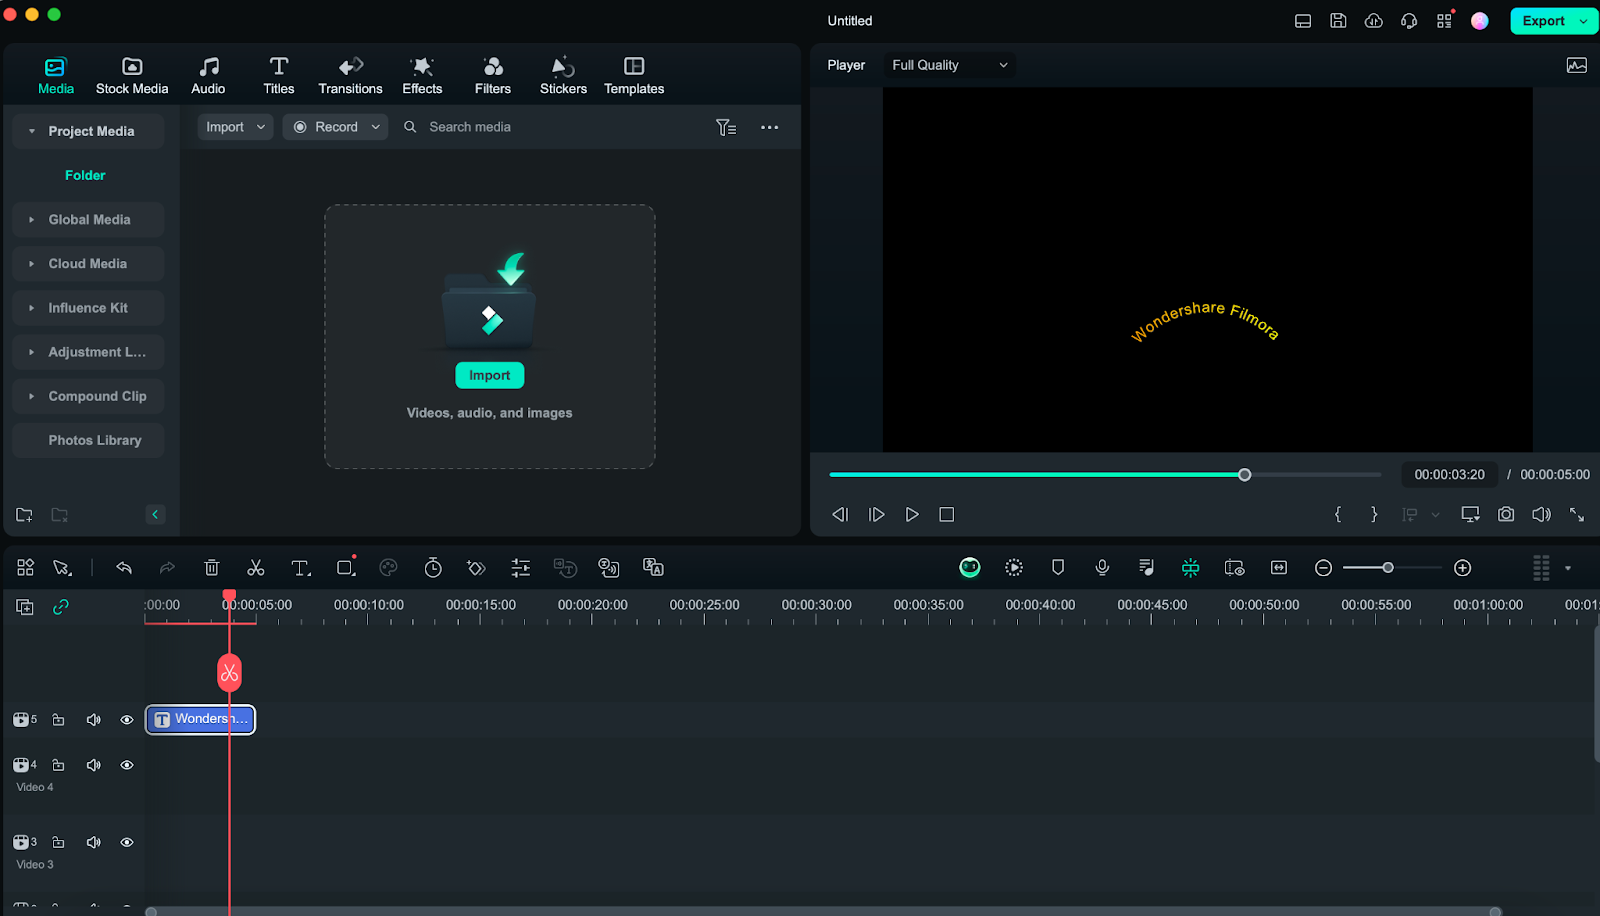
Step 1: Import Your Video
The first step in Filmora is importing a video file into the program you want to edit. To import a video from your computer, click the link ” Import” and choose the required clip. This brings the timeline to the top of the ‘Project,’ where you can drag the video onto it.
Step 2: Go to Text Tool:
Go to the “Titles” tab located at the screen’s top center. Filmora has several text templates. After deciding on the format or theme you need, you can simply click and drag it onto the timeline above the video clip.
Step 3: Add or edit the text
Place the cursor over the text template in the timeline and double-click it to reveal the text editing options. Add the text that you want in your created video. This could be a title, caption, or any other text element that you wish to include within your animation or cartoon.
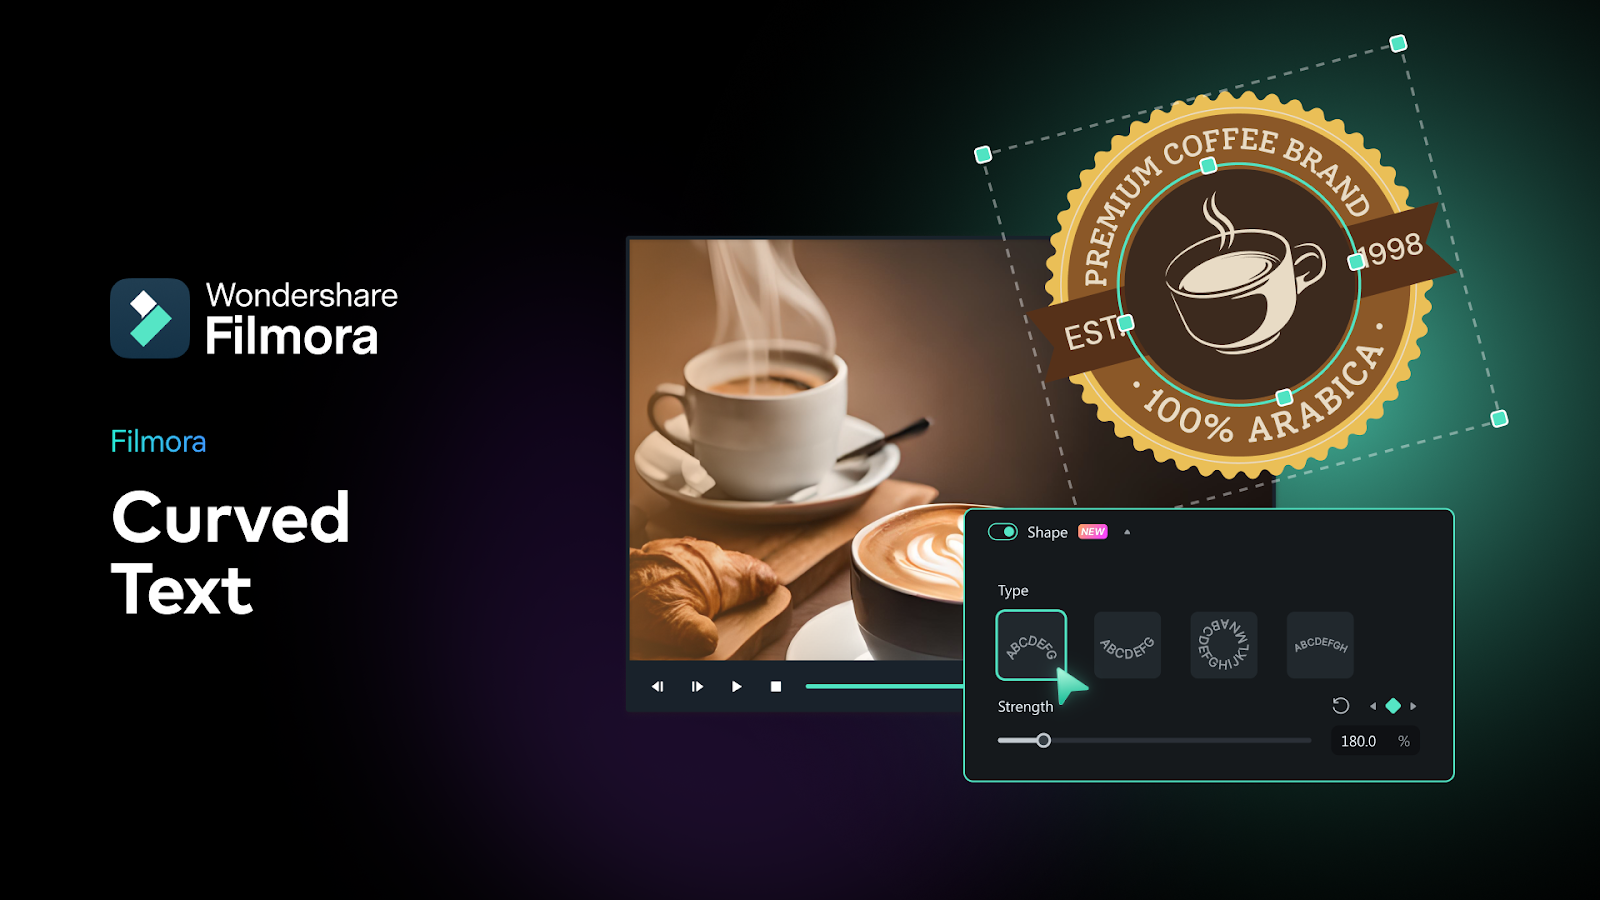
Step 4: Apply the Curve Effect
Double-click on the text box to get additional options for your text. Enable the “Shape” option to start curving your text. Drag the curvature slider by moving the slider to achieve the required curvature on the text.
Step 5: Customize Your Text
Filmora provides various customization options to make your curved text look perfect, like:
● Font Style: Select the fonts from the list to match the overall style and appearance of the video.
● Size and Color: Expand and contract text to make it easily distinguishable and to make the messages noticeable.
● Effects and Animation: To increase appeal add a finishing touch such as shadows, outlines, or animations where appropriate.
Step 6: Position the Text
After editing your curved text, tap on ‘complete’ to start positioning the desired text on the screen. Place the cursor over the text to be moved, then, with the mouse pointer button clicked, hold the mouse gesture and shift it to the required position. You can also control the time the text appears and disappears on the timeline.
Step 7: Export.
Preview your video and make sure the curved text appears as you want it to. Make any necessary adjustments. Once you are ready, click the save button at the top left of the screen to save your project and then export to the format of your choice.
Tips for Using Curved Text Effectively in Videos
● Keep It Readable: The text should be easily readable. Sticking to color combinations such as black and white or having a high contrast palette is recommended, as too complex fonts can often be hard to read for some viewers, especially when displayed on an electronic device.
● Consistency: When writing the text, it is good to use the same font and color on the screen to be consistent.
● Subtle Animations: To make the curved text more effective, use subtle animations that will give life to the text but won’t sit aggressively in the viewers’ eyes.
● Align with Elements: When writing in a curve, ensure the text is aligned with other shapes in your video to give a professional outlook.
Why is Filmora the Best to Use when Adding Curved Text?
Filmora stands out as an excellent choice for adding curved text to your videos for several reasons:
● Intuitive Interface: Filmora’s interface consists of a drag-and-drop feature and is relatively simple to use, ideal for a newbie or amateur as well.
● Advanced Text Editing Options: Filmora provides a lot of choices for text editing and you can adjust any parameter of your curved text.
● Real-Time Preview: There is no need to set the writing and editing apart and then compare the changes and appearance of the text side by side; now the real-time preview option allows seeing all the changes immediately.
● Comprehensive Editing Tools: In general, Filmora offers a wide range of features that can be useful when editing videos, such as effects, transitions, and audio tools to help output a perfect video.
Curved text adds something extra to your videos and makes them more engaging. Explore Filmora’s conveniently located text editing options and learn how to create curved text to enhance your videos effectively.


 Can Streaming Radio Ads Elevate Your Business to New Heights?